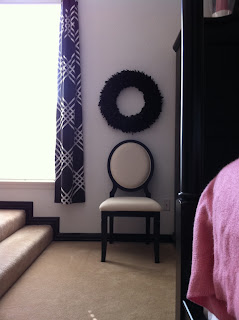
So what have I been doing in school for the last 5 weeks? Drawing, drawing and more drawing. For those faithful few who have been with me since inception, you will recall that drawing and Carla are not friends. Despite all of my hang-ups, my professor graciously bestowed on me the gift of an "A" in my Perspective class. This was not won without much paper ripping and eraser blowing on my part.
Check out this incredible student sample of an interior. (Note: This is NOT from me.) Although I am far from this level of beauty, I sure did learn a lot. During the class, we learned how to draw one-point, two-point and three-point perspective drawings. Additionally, we discovered that a composition is never complete until the shading is in place for the drawing -- including shadows placed according to the light source in your creation.
One-point perspective ala Carla Moss...
One-point perspective refers to viewing the picture head on only. It includes a vanishing point (or VP) where all the parallel edges and lines moving away from the viewer appear to collide. Parallel edges and lines that are also parallel to the ground plane will have a vanishing point on the horizon. A drawing can have one or more vanishing points, with no limits to the overall number of vanishing points. Are you snoring yet? Hang in there with me....It gets really good!
The above drawing shows my interior design office -- in one-point perspective. Using the vanishing point and the horizon line to begin my drawing, I went back and filled in the medium and dark shading after watching the instructional video and identifying the spots that needed some extra attention. If I had a fancy-smancy blog, you would be able to zoom in and see the texture on the drawing. I accomplished this by utilizing paper towels, q-tips and a blending stump. Finally, I erased away the light shadows that came in from the left window. These steps help breathe life into an otherwise bland composition.
The major challenge of all this? More depth on the bookshelves and the windows. How did I accomplish this? Searching books and spying ones in magazines/books. I even went so far as to snap a pic of a bookshelf at work. Armed with feedback from my instructor on how to use VPs more effectively and my discoveries, I was able to increase the lines to project depth employing vanishing points and shading. I also did the same technique to the windows. Whew! Even with all my corrections, I am told that my right hand shelves are still not up to standard.
Perspective class also included a chance to draw something from your house.
A photo of my bedroom
Bird's Eye View and Worm's Eye View are the other perspectives that we students attempted to master during our recent endeavors. Bird's Eye View is just like it sounds -- you look down on the subject from a vantage point. This type of drawing is a three-point perspective where the third vantage point is located just below the horizon. Worm's eye view (do worms even have eyes???) also has a self-explanatory namesake -- from the perspective of a worm. Freaky but necessary. In this one, instead of coming at it from above you obviously come at it from below. Most of the time, one of these (worm or birds eye) ends up being easier for the student to draw.
Worm's Eye View -- strange to think of a little critter looking up at the wide world...
Bird's Eye View --- more my style and my personality. Kinda like spiderman...
Taking my cue from the former projects, I began this one with the gorgeous magazine picture above for reference. This served as a strong jumping off point for my creation -- enabling me to see the furniture shadows and reflections without having to use my imagination too much! They served as reminders of getting the shadowing just right in my project. All with a controlled creative flair.
Take a deep breath....this is my actual project with people. Yikes.
I won't sugar coat the fact that this wasn't my favorite class. Furniture, accessories, fabric and paint are the way I like to roll. Drawing is for those who can actually do it. However, it is a necessary evil that I needed to learn. Frankly, I surprised myself by the fact that I could actually create any semblance of a masterpiece. (Quick pat on my back) Color is important but shadowing and shading do wonders for the creation. With my confidence boosted, I now have another weapon in my arsenal to wow those future clients!
So...as I come to the middle of my Art Institute Marathon, I'm off to read for pleasure and eat lunch with my long lost friends. Time to take a deep breath and get ready for next mile in the race to "designerhood". Next stop: Development of Form.
Blistered but Blissful-
C
Blistered but Blissful-
C


No comments:
Post a Comment